The Importance of API Documentation
An API (Application Programming Interface) is only as good as its ease of adoption and integration. As such, you want your clients, may it be internal or third-party developers, to be able to easily and painlessly integrate with your API.
A well-documented API will certainly help in making your platform a success. Seriously, the business or sales team in your company will appreciate you A LOT.
Java API Documentation Tools
There are several API documentation tools in the Java ecosystem, but none of them is as popular as Swagger. There’s RAML and Enunciate if you want to check alternatives. However, in this post we are focusing on Swagger.
Swagger is popular because it’s really easy to use. Furthermore, its specifically built following the OpenAPI Specification. There are two main implementations built on top of Swagger for spring: springfox and springdoc-openapi.
The main difference is that springdoc currently supports OpenAPI 3 and springfox doesn’t. The good news is, springdoc can live peacefully alongside springfox, and therefore, migration won’t be difficult. I can attest to the painless migration because I recently migrated an existing documentation from springfox to springdoc.
Using springdoc-openapi
First, we need to create a simple API using spring-boot. This sample API is a CRUD Employee API.
We need to add the springdoc-openapi library. We can either use the core library or the bundled swagger-ui library. We are going to use the latter in this sample.
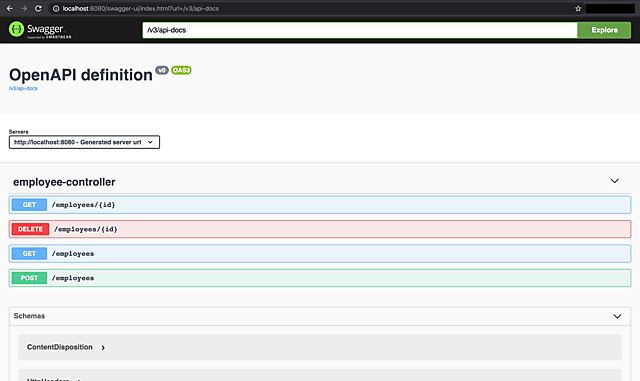
implementation 'org.springdoc:springdoc-openapi-ui:1.2.17'We can get the documentation in JSON format at http://localhost:8080/v3/api-docs. It’s always better to look at the documentation visually at http://localhost:8080/swagger-ui.html. If we access the swagger-ui page now, we will see that adding the library instantly picked up our Employee controller.

We can disable swagger-ui with a property: springdoc.swagger-ui.enabled=false.
That’s it! We can now configure our endpoints to be more helpful than the default one. Swagger has a very good documentation, which we can use to configure our documentation.
Documentation
The starting point of documenting our endpoints is the controllers. Within our controllers, we can document our public methods (API) by specifying path, media type, parameters, request body and response.
Paths and Operations
For paths we can specify it by using the different @XxxMapping methods:
All @XxxMapping will be fetched by springdoc and will be used as we expected. So a @RequestMapping class-level annotation will be the base path and a @GetMapping method-level annotation will just add more to the base path.
@RequestMapping("/employees")
public class EmployeeController { ... }
@GetMapping(value = "/{id}")
public ResponseEntity<?> get(@PathVariable long id) { ... }The annotations above will specify the path and operation (http method) of the endpoint.

Parameters
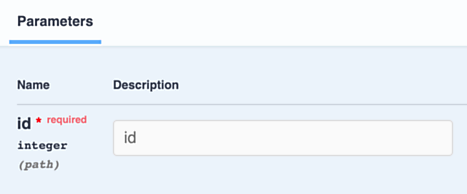
Our GET endpoint above also has an {id} path variable or parameter. springdoc fetches @PathVariable and @RequestParameter annotations. However, if we want more control over them we can use the @Parameters and @Parameter annotations.
With @PathVariable we get this when we expand the GET panel:

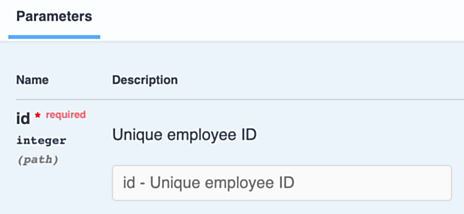
When we use @Parameter, we get this:
public ResponseEntity<?> get(@Parameter(description = "Unique employee ID") @PathVariable long id) { ... }
Media Type
It’s helpful, especially if we want to test the endpoints within Swagger UI, if we document the media type our endpoints support.
We can specify the media types with the @XxxMapping annotations:
@PostMapping(consumes = MediaType.APPLICATION_JSON_VALUE, produces = MediaType.APPLICATION_JSON_VALUE)
public ResponseEntity<?> create(@RequestBody EmployeeCommand command) { ... }
As we can see from the image above, springdoc pre-fills the media type dropdown. It does the same thing for the response.
Request and Response Body
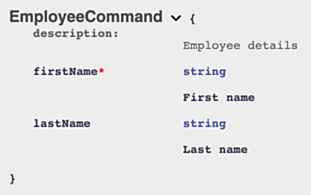
Request and response bodies are documented as schemas, using the @Schema annotation.
By default, springdoc generates these straight from the @RequestBody and the return type of the method.
The simplest way to use @Schema annotation is within the request or response body class itself:
@Schema(description = "Employee details")
public class EmployeeCommand {

    @Schema(description = "First name", required = true)
    private String firstName;

    ...
}
Response
The last part for a minimal documentation for our API are the responses that our endpoints can give.
Springdoc provides sane, but very minimal defaults. To make it more helpful we can use @Operation and @ApiResponse:
@Operation(description = "Retrieves a single employee", responses = {
    @ApiResponse(responseCode = "200", description = "Employee with given ID found", content = @Content(mediaType = MediaType.APPLICATION_JSON_VALUE, schema = @Schema(implementation = Employee.class))),
    @ApiResponse(responseCode = "404", description = "Employee with given ID not found")
})
public ResponseEntity<?> get(@Parameter(description = "Unique employee ID") @PathVariable long id) { ... }
Conclusion
We’ve discussed the basics of using springdoc-openapi to generate documentation for our API. And there’s so much more to learn. Tags, refs, security, and global configuration are some of the things that come to mind.
You can head to springdoc-openapi’s demo GitHub for more samples. Good luck in your journey!